How to Use a CNC Milling Machine: A Complete Guide for Beginners and Professionals

Cultivated in CNC Machine Industry for 20+ years.
Specializing in CNC Milling, Drilling, Turning, Tapping, and so on...
Self-created Brand LiSN for 10+ Years



How to Use a CNC Milling Machine: A Complete Guide for Beginners and Professionals
Introduction: Understanding CNC Milling Machine Operation
A CNC milling machine is one of the most important pieces of equipment in modern precision manufacturing. It uses computer numerical control (CNC) technology to automatically control cutting tools and remove material from a workpiece to create complex components with high accuracy.
From aerospace parts and automotive components to medical devices and industrial equipment, CNC milling machines are widely used because they provide excellent repeatability, efficiency, and machining precision.
However, achieving high-quality machining results requires more than simply pressing the start button. Proper machine setup, tool selection, workpiece positioning, programming, and process monitoring are essential for safe and efficient CNC milling operations.
This guide explains how to use a CNC milling machine step by step, based on practical machining experience and professional manufacturing requirements.
1. Understand the Basic Structure of a CNC Milling Machine
Before operating a CNC milling machine, operators should understand its main components and functions.
A typical CNC milling machine includes:
CNC Controller
The CNC controller is the “brain” of the machine. It reads G-code programs and controls axis movement, spindle speed, feed rate, and machining operations.
Spindle System
The spindle holds and rotates the cutting tool. Different spindle speeds are selected depending on the material, cutter type, and machining requirements.
X, Y, Z Axis System
Most CNC milling machines operate through three basic axes:
- X-axis: Controls left and right movement
- Y-axis: Controls front and back movement
- Z-axis: Controls vertical movement
Advanced machines may include 4-axis or 5-axis functions, allowing machining of more complex geometries.
Workholding System
The workpiece must be securely fixed using:
- CNC vise
- Fixture
- Soft jaws
- Clamping system
A stable setup is critical because even small movement during cutting can affect dimensional accuracy.
2. Prepare the CNC Milling Machine Before Operation
Before starting machining, a professional operator should complete several preparation steps.
Check Machine Condition
Inspect:
- Lubrication system
- Coolant level
- Hydraulic or pneumatic pressure
- Machine cleanliness
- Tool condition
Proper maintenance helps prevent machine failure and improves machining stability.
Select the Correct Cutting Tools
Tool selection depends on:
- Material type
- Cutting depth
- Required surface finish
- Machining accuracy
Common CNC milling tools include:
- End mills
- Ball nose cutters
- Face mills
- Drills
- Taps
For example:
- Aluminum machining usually uses high-speed carbide tools with sharp cutting edges.
- Stainless steel machining requires stronger carbide tools with suitable coatings.
- Titanium machining requires optimized cutting parameters to control heat.
3. Install and Set CNC Cutting Tools
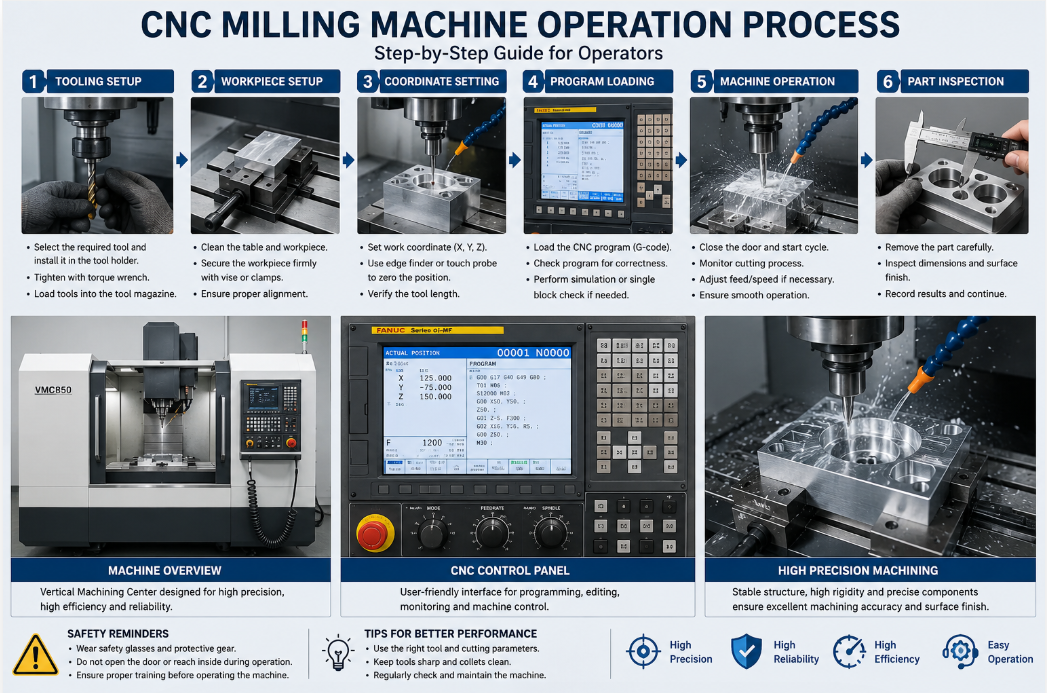
After selecting tools, install them into the tool holder and load them into the machine tool magazine.
Important steps include:
Tool Installation
Check:
- Tool diameter
- Tool length
- Tool holder condition
- Tool clamping force
Incorrect tool installation can cause vibration, poor surface finish, or tool breakage.
Tool Length Measurement
The CNC system needs accurate tool length compensation.
Operators normally set:
- Tool length offset
- Tool diameter compensation
This ensures that the machine knows the exact cutting position.
4. Secure the Workpiece and Set Work Coordinates
Correct workpiece setup is one of the most important steps in CNC milling.
Workpiece Clamping
The part must be:
- Properly aligned
- Firmly clamped
- Free from movement
Poor workholding may cause:
- Dimensional errors
- Surface defects
- Tool damage
Set Work Offset
The operator must establish the machining zero point.
Common CNC work coordinate systems include:
- G54
- G55
- G56
The zero position can be set using:
- Touch probe
- Edge finder
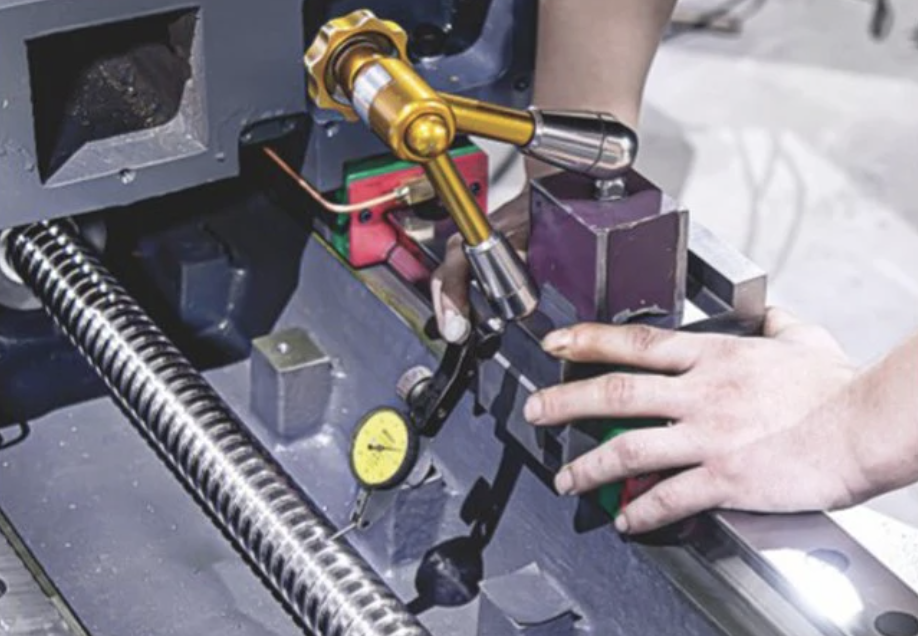
- Dial indicator
- Manual measurement tools
Professional CNC operators always verify the datum before machining.
5. Load CNC Program and Verify G-Code
The CNC program contains machining instructions generated from CAD/CAM software.
The workflow is:
Step 1: Create 3D CAD Model
Engineers design the component using CAD software.
Examples:
- SolidWorks
- AutoCAD
- Siemens NX
- Fusion 360
Step 2: Generate CAM Toolpath
CAM software creates:
- Cutting paths
- Tool selection
- Cutting parameters
- G-code
Step 3: Transfer Program to CNC Controller
Programs can be loaded through:
- USB
- Network connection
- DNC system
Before production machining, operators should perform:
- Program simulation
- Dry run
- Single block verification
This reduces the risk of tool collision and machine damage.
6. Start CNC Milling Operation
After completing setup, the machining process can begin.
The basic operation sequence is:
1. Machine Homing
The machine returns to its reference position.
2. Spindle Start
The spindle rotates according to programmed RPM.
3. Coolant Activation
Coolant helps:
- Reduce cutting temperature
- Improve tool life
- Remove chips
4. Automatic Machining
The CNC controller moves the cutting tool according to programmed coordinates.
During machining, operators should monitor:
- Cutting sound
- Tool vibration
- Chip condition
- Surface quality
- Machine alarms
7. Inspect Finished CNC Machined Parts
Quality inspection is essential for precision CNC machining.
Common inspection equipment includes:
- CMM (Coordinate Measuring Machine)
- Micrometer
- Vernier caliper
- Height gauge
- Surface roughness tester
Important inspection factors:
Dimensional Accuracy
Check whether the part meets drawing requirements.
Typical CNC machining tolerances:
- Standard machining: ±0.05 mm
- Precision machining: ±0.01 mm or better
Surface Finish
Surface quality depends on:
- Cutting parameters
- Tool condition
- Machine rigidity
- Material properties
8. CNC Milling Machine Safety Rules
Safety should always be the first priority.
Operators should:
✔ Wear safety glasses
✔ Keep the working area clean
✔ Secure workpieces properly
✔ Confirm tool installation
✔ Check machine guards
✔ Never touch rotating tools
✔ Stop the spindle completely before cleaning chips
CNC milling machines can be dangerous if operated incorrectly, and proper training and protective equipment are essential.
9. Tips to Improve CNC Milling Efficiency
Experienced CNC machinists improve productivity through:
Optimize Cutting Parameters
Adjust:
- Spindle speed (RPM)
- Feed rate
- Cutting depth
- Step-over distance
Use Proper Fixtures
Customized fixtures can:
- Reduce setup time
- Improve repeatability
- Increase production efficiency
Maintain Cutting Tools
Replace worn tools before they affect quality.
Tool wear can cause:
- Poor surface finish
- Dimensional deviation
- Increased machining costs
Conclusion: Mastering CNC Milling Machine Operation
Learning how to use a CNC milling machine requires a combination of technical knowledge, machining experience, and attention to detail.
A successful CNC milling process depends on:
- Correct machine setup
- Proper tooling selection
- Accurate programming
- Stable workholding
- Strict quality control
Whether producing prototypes, small-batch components, or high-volume production parts, professional CNC milling operation can significantly improve manufacturing efficiency and product quality.
With advanced CNC technology, multi-axis machining capability, and experienced operators, modern CNC milling machines continue to play a critical role in precision manufacturing industries worldwide.
Flat-Bed CNC Lathe vs Slant-Bed CNC Lathe: A Practical Buying Guide
You are worth collecting the causes and precautions for six common defects of the casting
Related Article